Gitlab部署
一、前言
1、本文主要内容
GitLab社区版部署
GitLab配置禁用创建组权限
GitLab配置邮件(SMTP)
Gitlab备份配置
GitLab常用命令说明
2、GitLab介绍
GitLab一个开源的git仓库管理平台,方便团队协作开发、管理。在GitLab上可以实现完整的CI(持续集成)、CD(持续发布)流程。而且还提供了免费使用的Plan,以及免费的可以独立部署的社区版本(https://gitlab.com/gitlab-org/gitlab-ce )。官网:https://about.gitlab.com/
二、准备工作
1、安准基础依赖(这一步基本都可以跳过,很多服务器默认安装)
1
2
3
4
5
6
#安装技术依赖
sudo yum install -y curl policycoreutils-python openssh-server
#启动ssh服务&设置为开机启动
sudo systemctl enable sshd
sudo systemctl start sshd2、安装Postfix
Postfix是一个邮件服务器,GitLab发送邮件需要用到
1
2
3
4
5
6#安装postfix
sudo yum install -y postfix
#启动postfix并设置为开机启动
sudo systemctl enable postfix
sudo systemctl start postfix3、开放ssh以及http服务
根据实际情况执行,公司内部服务器初始时,防火墙就没打开
1
2
3
4
5
6
#开放ssh、http服务
sudo firewall-cmd --add-service=ssh --permanent
sudo firewall-cmd --add-service=http --permanent
#重载防火墙规则
sudo firewall-cmd --reload三、部署过程
本次我们部署的是社区版:gitlab-ce,如果要部署商业版可以把关键字替换为:gitlab-ee
1、Yum安装GitLab
添加GitLab社区版Package
1
curl https://packages.gitlab.com/install/repositories/gitlab/gitlab-ce/script.rpm.sh | sudo bash
安装GitLab社区版
1
sudo yum install -y gitlab-ce
安装成功后会看到gitlab-ce打印了以下图形

异常处理:
出现“policycoreutils-python is needed by问题”,应该是在安装gitlab时,gitlab的版本是centos7的,如果你确定你的centos版本是centos7
解决方法:
1 | sudo yum installpolicycoreutils-python |
如果这个方法无效,你的centos版本一定不是centos7
如果你的centos版本是centos8.那么换一个gitlab版本,也就是重新下载一个,这里是最新地址
1 | https://mirrors.tuna.tsinghua.edu.cn/gitlab-ce/yum/el8/ |
下载命令:
1 | wget https://mirrors.tuna.tsinghua.edu.cn/gitlab-ce/yum/el8/gitlab-ce-12.10.1-ce.0.el8.x86_64.rpm |
安装:
1 | sudo rpm -i gitlab-ce-12.10.1-ce.0.el8.x86_64.rpm |
若出现错误“policycoreutils-python-utils is needed by gitlab-ce-12.10.1-ce.0.el8.x86_64”
解决办法:
1 | sudo yum install policycoreutils-python-utils |
然后重新安装。
参考:https://blog.csdn.net/fu18838928050/article/details/107901895
2、配置GitLab站点Url
GitLab默认的配置文件路径是/etc/gitlab/gitlab.rb
默认的站点Url配置项是:
1 | external_url 'http://gitlab.example.com' |
这里我将GitLab站点Url修改为”external_url ‘http://192.168.0.80:9000”
也可以用IP代替域名,这里根据自己需求来即可
1 | #修改配置文件 |
3、启动并访问GitLab
启动GitLab
1
2
3
4
5
6
7
8
9
10
11
12
13
14
15
16#重新配置并启动
sudo gitlab-ctl reconfigure
#完成后将会看到如下输出
Running handlers complete
Chef Client finished, 432/613 resources updated in 03 minutes 43 seconds
gitlab Reconfigured!
Notes:
Default admin account has been configured with following details:
Username: root
Password: You didn't opt-in to print initial root password to STDOUT.
Password stored to /etc/gitlab/initial_root_password. This file will be cleaned up in first reconfigure run after 24 hours.访问GitLab
将设置的域名DNS解析到服务器IP,或者修改本地host将域名指向服务器IP。
访问:http://192.168.0.80:9000
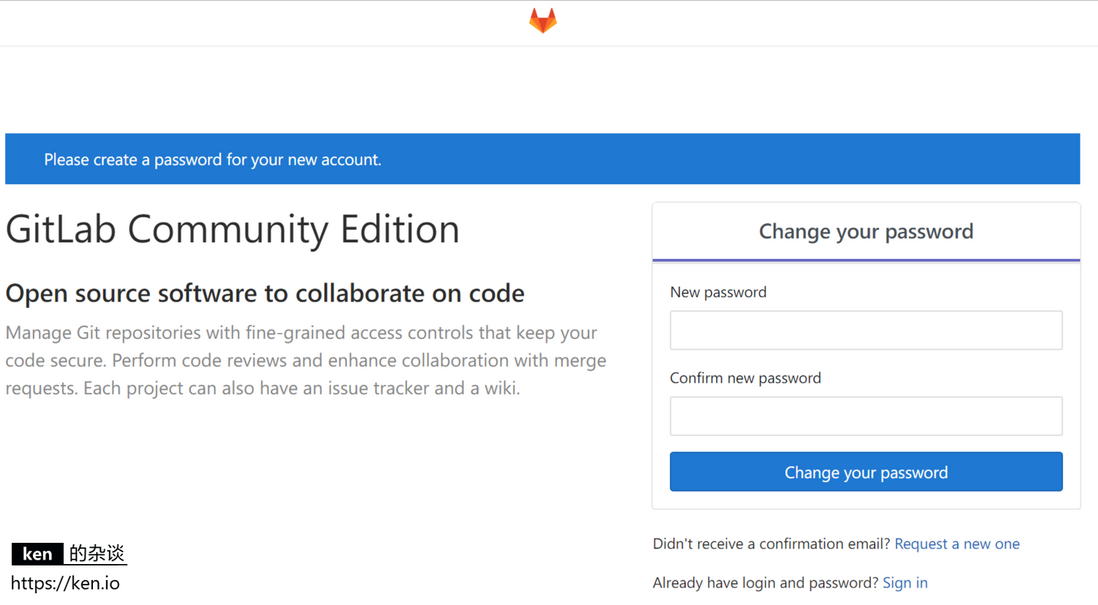
这时候会提示为管理员账号设置密码。管理员账号默认username是root。
设置完成之后即可使用root账号登录,登陆后会进入欢迎界面。

四、GitLab常用配置
1、邮件配置
配置邮箱可以让GitLab在发生相应事件的时候进行邮件通知
比如配置腾讯企业邮箱如下:
1 | gitlab_rails['smtp_enable'] = true |
具体参考:
https://docs.gitlab.com/omnibus/settings/smtp.html
2、禁用创建组权限
GitLab默认所有的注册用户都可以创建组。但对于团队来说,通常只会给Leader相关权限。
虽然可以在用户管理界面取消权限,但毕竟不方便。我们可以通过配置GitLab默认禁用创建组权限。
1 | #修改配置文件 |
3.配置代码位置
找到git_data_dirs 选型,配置地址
1 | git_data_dirs({ |
参考链接:https://docs.gitlab.com/omnibus/settings/configuration.html
4.gitlab 备份
1)修改配置文件
1 | # 打开gitlab配置文件 |
执行wq保存后,刷新配置
1 | gitlab-ctl reconfigure |
2)执行备份命令验证
执行备份命令,去对应的文件路径查看是否已经创建了备份文件
1 | gitlab-rake gitlab:backup:create |
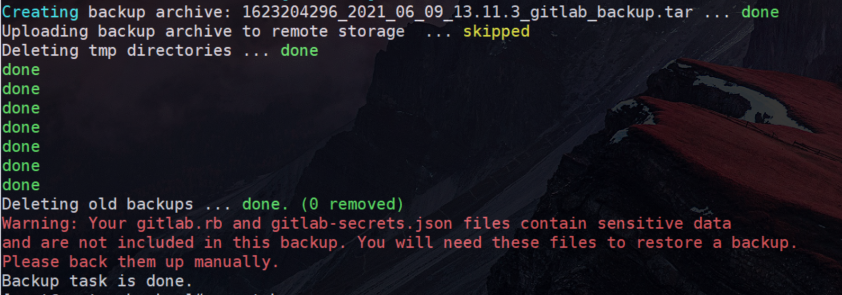
执行打印如下:
红色字体描述为 gitlab.rb 和gitlab-secrets.json为敏感文件需要手动备份
3)通过cron定时备份
方法1、在命令行输入: crontab -e 然后添加相应的任务,wq存盘退出。
1 | #输入命令crontab -e |
方法2、直接编辑/etc/crontab 文件,即vim /etc/crontab,然后添加相应的任务
1 | # edited by ouyang 2017-8-11 添加定时任务,每天凌晨两点,执行gitlab备份 |
重启cron服务
1 | systemctl restart crond.service |
5.gitlab-ctl常用命令介绍
| 命令 | 说明 |
|---|---|
| check-config | 检查在gitlab中是否有任何配置。在指定版本中删除的rb |
| deploy-page | 安装部署页面 |
| diff-config | 将用户配置与包可用配置进行比较 |
| remove-accounts | 删除所有用户和组 |
| upgrade | 升级 |
| service-list | 查看所有服务 |
| once | 如果GitLab服务停止了就启动服务,如果已启动就不做任何操作 |
| restart | 重启GitLab服务 |
| start | 如果GitLab服务停止了就启动服务,如果已启动就重启服务 |
| stop | 停止GitLab服务 |
| status | 查看GitLab服务状态 |
| reconfigure | reconfigure重新配置GitLab并启动 |